
Premium Finishes When Routing Acrylic
Routing has become one of the most common methods of acrylic fabrication in the sign and point-of-purchase industries, with growing use in machine building, medical devices, and valve applications.
Across these applications, a common requirement is a premium finished edge without additional post-routing finishing. Four factors typically affect edge quality: tooling, programming, machine condition, and fixturing. This article focuses on tooling and programming.
Tooling
Tool diameter is one of the first considerations when selecting router tooling for acrylic.
Although cutter diameters in the 1/8- to 1/4-inch range are common, designing parts, fixtures, and programs around 3/8- to 1/2-inch tooling can significantly improve surface finish and consistency.
Larger-diameter tools provide greater stability and deeper flute capacity. Beyond approximately 1/2 inch, however, the improvement is generally marginal for sheet stock when depths of cut remain below about 2 inches.
Cutter Configuration
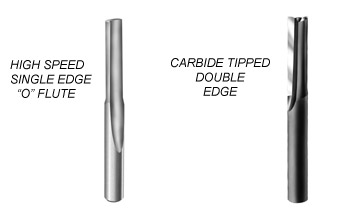
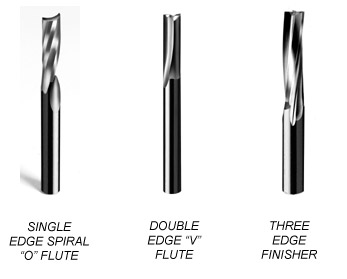
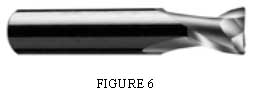
Cutter configuration is another major selection criterion. As a general rule, smaller-diameter cutters are more likely to produce the best edge finish in a spiral configuration.
Straight flutes generally perform well at larger diameters, while spiral tools tend to excel at 1/4 inch and below.
At larger diameters, low-helix multi-flute tools often produce strong results, although performance varies depending on whether the acrylic is cast or extruded and whether fillers are present.
Double-edge straight tools can also perform well at larger diameters. Both V-flute and O-flute geometries have proven effective through testing and industry use.

Specialty Acrylic Tooling
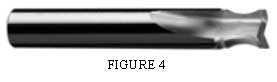
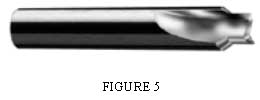
Specialty cutters are also available for specific finishing operations.
These include tools designed to create radiused edges, tools that rout a finished edge while simultaneously applying a top chamfer, and cutters designed to create a smooth pocket bottom without the swirling marks produced by standard router-bit points.
Specialty cutters can solve recurring finish problems while also reducing tool-change time or allowing multiple operations on machines without automatic tool changers.
Programming
Selecting the correct cutting parameters and machining methods is essential when edge finish is the primary goal.
Every combination of material and cutter has a preferred operating range, and relatively small changes in feed rate, spindle speed, or cutting method can significantly affect surface finish.
Feeds, Speeds, and Chipload
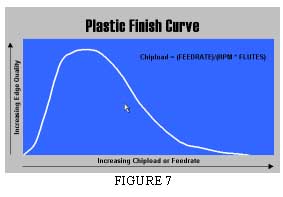
Acrylic has a relatively narrow chipload range for producing an optimum finish. The correct chipload varies by cutter diameter, cutter configuration, and material.
Using a spindle speed of 18,000 RPM and a depth of cut approximately equal to the cutter diameter, the following feed rates provide useful starting points:
- 1/8-inch tooling: 75–100 IPM
- 1/4-inch tooling: 100–200 IPM
- 3/8-inch tooling: 125–250 IPM
- 1/2-inch tooling: 150–300 IPM
If the router bit remains stable and the workpiece is securely fixtured, these feed rates can often be increased by increasing spindle speed.
Climb vs. Conventional Cutting
After speeds and feeds have been established, cutting direction becomes another important consideration.
Larger-diameter tools generally perform better using conventional cutting. Smaller-diameter tools are more material-dependent and should be tested using both climb and conventional cutting to determine which produces the better finish.
Finish Passes
Smaller-diameter tools are more likely to benefit from a separate finishing pass. With 3/8- and 1/2-inch tooling, the improvement from a two-pass process is often relatively small.
One common problem is leaving too little material for the finish pass.
Entry Methods
Cutter entry can also affect surface quality. Acrylic does not typically suffer from chip wrap as severely as softer plastics, but it can craze or crack during aggressive plunging.
Slowing the plunge feed rate can help, but a ramped entry often provides better results and reduces the melting that can occur during a direct plunge.
Router bits also lack the centering point found on drill bits, so they can “walk” laterally while plunging. This can create an entry hole slightly larger than the routed slot.
Ramping reduces this effect. Another effective method is to plunge into a scrap area and then move laterally into the final cutting path.
Depth of Cut
Depth of cut is another important factor in maintaining consistent finish and preventing tool breakage.
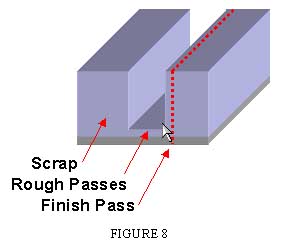
When cutter breakage is a concern, multiple depth passes can be used followed by a final full-depth cleanup pass of approximately 0.015 inch.
This approach can provide a premium edge finish while reducing breakage risk with smaller-diameter tools.
For small or intricate parts such as letters, the bottom paper masking can be left intact during the depth passes. This allows the vacuum system to continue holding the part during the final cleanup pass.
Conclusion
Premium acrylic edge finish depends on selecting the correct tooling and operating it within an appropriate range of cutting parameters.
Cutter diameter, flute configuration, chipload, feed rate, spindle speed, cutting direction, entry method, finish allowance, and depth of cut all influence the final surface.
These guidelines provide useful starting points, but detailed recommendations should ultimately be based on the specific tool, acrylic material, and application.